Pages

Showing posts with label Chain. Show all posts

November 9, 2013

Girly pink, edgy spikes

On a recent visit home, I got to spend some much needed time with my jewelry supplies.  For months I had saved pictures of jewelry that I liked in anticipation of my reunion to my bead boxes.

A style of necklace that I started to see a lot involved at least 2 rows of chain, lots of head pins, and a repetitive pattern of beads.

Some examples:
Examples of necklaces with the 2+ chain style, from my Pinterest board.

With the second necklace in mind especially, I selected the beads and chains I liked best for my DIY necklace.

My DIY Necklace
What you need:
- A chain with small links
- 14 flat headed head pins in the same color as the chain.
- 4 different types of beads in increasing sizes, 14 of each.
- Spikes or other elongating bead (tear drop, leaf shape, etc), 14 of each.
- Round-nose pliers and wire cutters.
- Clasp and jump rings

Directions:
1. First, measure out the chain required for each row of the necklace.  I had 14 columns of beads, and I put a space of 3 chain links in between each column.  Therefore, my 3 rows of chains were each 53 links in length.
2. Next, slide one of the smallest beads onto the head pin.
3. Put the head pin with the bead through the first link of the first row.
4. Add the next bead of incremental size onto the head pin and put the head pin through the first link of the second row.
5. Add the 2nd largest bead onto the head pin and put the head pin through the first link of the third row.
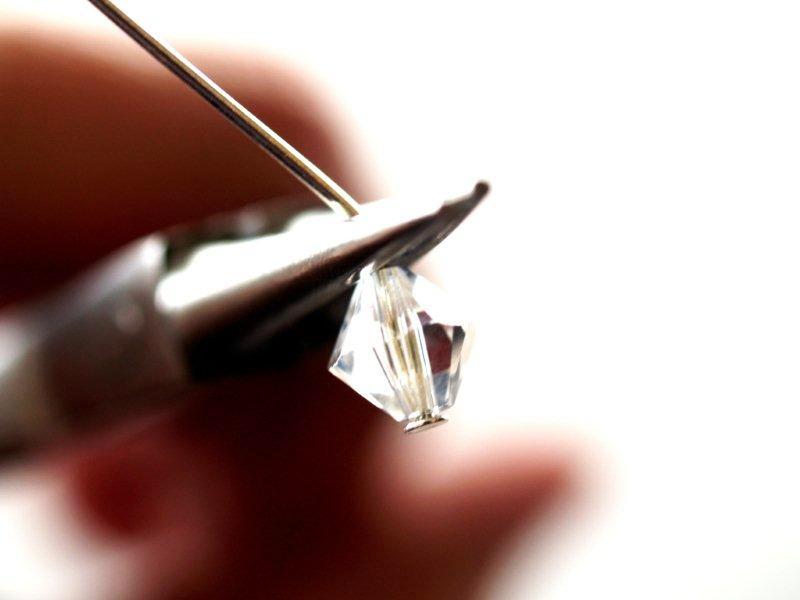
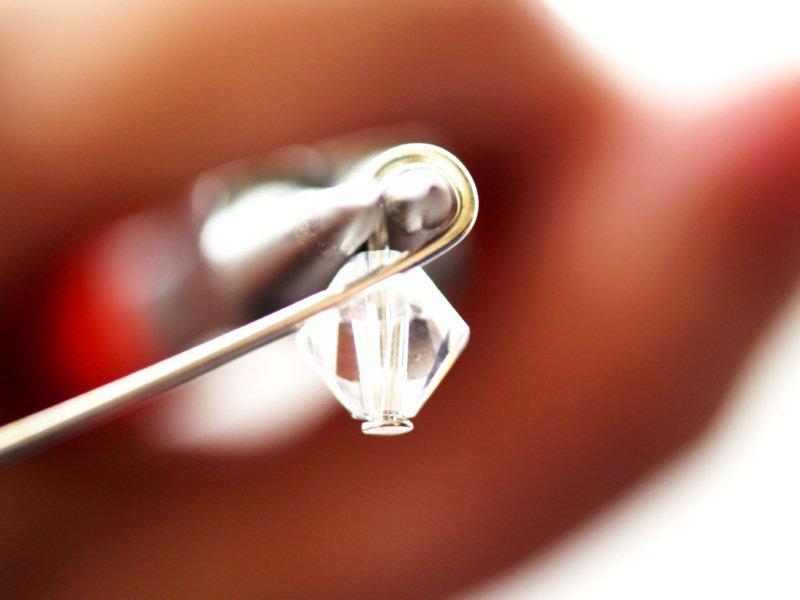
6. Add the largest bead onto the bead pin and use the round-nose pliers to close the pin.
7. Add the spiked bead to the end of the closed pin with a jump ring.

Repeat steps 2-7.  For this necklace I did steps 2-7 fourteen times and with 3 links in between each head pin / column.

8. Once the bulk of the necklace has been assembled, add a chain to each end of the top row.  Attach a clasp and jump rings to the end of the chain you just added.

All done!

I made my necklace with light pink, turquoise blue and silver beads, and silver spiked beads.  I like the girly, yet edgy feel of the necklace.  Unlike most DIY creations made from pictures, this necklace sits very well on. And I love finding different outfits to pair it with!


July 6, 2013

Chain of Change


Life is in serious transition mode now.. In all of this change occurring, I am trying to keep in mind the adage,

"Every end is a new beginning."


After a year, I've decided to postpone my return to America and continue living abroad.

Though there are so many changes now, what hasn't changed is my continued search for inspiration and love for DIY :)

I made this jump-ring chain necklace a while ago now and am still waiting for the perfect opportunity to don it.
MariaFrancescaPepe Tubular Chain Bracelet

The inspiration came from a picture I found on Pinterest (of course!) of a MariaFrancescaPepe bracelet.

After studying the picture for awhile to deduce how the jump rings were attached to each other, I set to work.

At its most basic form, all you really need to make this is A LOT of jump rings, pliers (or two pairs to save your fingers!), and a clasp... and patience.

How To:
(I made these pictures in hopes of making the instructions as understandable as possible!)
1. Open a smaller jump ring (or a chain of them or a paper clip) and slide on two jump rings.
2. Open and add two jump rings perpendicularly to the first two grey jump rings.
3. Push the blue jump rings back (so that they are parallel with the smaller jump ring). 
4. Slide the grey jump rings open so they make a 'V' and have the blue jump rings come forward.  Open two more jump rings and attach them to the blue jump rings.
5. Add two more jump rings perpendicular to the green jump rings you just added.  This is the same thing you did in step 2.
6. Push the purple jump rings back (so they are parallel with the blue jump rings.  Again, this is the same as step 3).
7. Slide the green jump rings open so they make a 'V' and have the purple jump rings come forward.
8. Open two more jump rings and attach them to the purple jump rings.

Pretend these two new jump rings are the green jump rings in step 5 and that you now need to add purple jump rings and then light grey jump rings
Keep repeating steps 5-8 until you get to your desired length.  Add a smaller jump ring to the end and a clasp.
A beautiful jump ring chain made (hopefully!) easy!

I decided to make a necklace instead of a bracelet - thoughts?


May 3, 2013

Braced with Chain and String

Can't believe it's been over a month since I was home.  And can't believe it's taken me this long to write up another blog post!  Life here is busy to say the least.

Before I went home, I had been seeing these bracelets at fancy stores all over the place.. selling for at least $25 each.  Recognizing that they are just chain, suede string, and some connecting pieces, I of course exclaimed, "wait, I can make this!".

I had been unable to find chain that was thick enough for the purpose of these bracelets at my local craft store.  I therefore waited until my trip to America to really scour the craft stores for the right materials for this project.

The bracelet took under 30 minutes to make; I ended up making a bunch of them!

Here's what you need:
- 2 pieces of chain (about 8-10 inches, depending on your wrist).
- Suede string, 2.5 times the length of your chain.
- lobster clasp and jump rings
- craft glue
- pliers
- scissors

What to do:
1. Using a jump ring, attach the first links of the two chains together.
2. Lay the chains down so that they are flat and the links line up to one another.
3. Start weaving the suede string between the links (in, over, under).
4. Once you've weaved through a few links, glue the tail of the suede string to itself.  (Do this on the side of the bracelet that will face your wrist, so that it will not be seen when you wear it.)
5. Continue weaving the suede string the same way between the links of the two chains.
6. At the end, once again connect the last two links with a jump ring.  Again, glue the suede string to itself on the side facing your wrist.
7. Cut any extra suede string from either side, once the glue has dried.
8. Open one of the jump rings on one end and add a lobster clasp.  Close the jump ring.
9. On the other end, attach as many extra jump rings as necessary to allow ease of putting on the bracelet!

With buying most of the supplies in bulk packs from the craft store, the bracelets ended up only costing a few dollars each!

I ended up keeping one for myself and giving the rest as gifts.  Everyone loved them!

February 6, 2013

Chain, Overlap, Chain.

One of my favorite necklaces on my jewelry tree is a chain and ribbon necklace I got super on-sale from Harrods during my time studying abroad in London.  The necklace is composed of overlapping thick gold chains and a black ribbon to hold it around my neck.
Necklace from 'Bella Shay Fine Fashion Jewelry and Accessories'
I came across the necklace above on Pinterest a few months ago.  It reminded me of the overlapping chains in my Harrod's necklace, but instead with two colors of thin chains, and no ribbon.

Then, over the summer, I found this black chain and this black with gold tint chain for just a few dollars each. 

And proceeded to make my own version of this necklace!
My DIY!
1. I first measured out a piece of black chain to the desired length of the necklace.
2. I cut equal pieces of black chain and gold tinted chain.  The black chain I cut again, in half.  I then attached the three pieces of chain together: black chain --> gold tinted chain --> black chain.
Make 10 of these.
3. I attached the first chain to the left-most spot I wanted, to the middle of the necklace.
4. Repeat this step, but with each new attaching chain, affix the beginning of the chain to every other link in the necklace, and then the end of the chain to every other link after the middle.

August 5, 2012

Who Doesn't Like Braids?

I've seen this braided bead necklace on tons of Pinterest boards!
Of course, I had to make it!

The DIY Inspiration
The most time consuming aspect of this necklace was stringing 6 strands of beads (2 for each piece of the braid).

Supplies:
- a lot of 1 bead type
- string
- 6 crimping clasps (also called bead tips?)
- 2 jump rings
- chain
- closing clasp
-pliers

For photo instructions, check out this image.

I went to ACMoore and bought a pack of reddish coral beads for this.  I cut 6 pieces of string, and tied them 2, 2, and 2 (so three strands).  Once I beaded to the desired length, I closed the knots of each 3 strands to separate crimping clasps, on each side (so 6 clasps total). Close the crimping clasps.  Then, braid!!
Once the beads are neatly braided, I combined the 3 closing clasps on the left onto one jump ring, and the 3 clasps on the right onto a second jump ring.
Then, attach the chain to the jump rings on each side.  Open the chain at the top to put on a closing clasp.  All done!


I made a second one in white with gold chain for my mom.  But, it looked great on my sister, so we gave it to her!


Bauble Bead Necklace, Part II

My first post on this blog shared a pink beaded cluster chain necklace I made, inspired by this necklace.  It's one of my favorite necklaces, I wear it all the time!
My mom, a stellar crafter - (I always ask her advice when I make things!), asked me to make one for her also!


I made this one with gold chain instead of silver.  Rather than pink beads again, I used purple and gold beads, on gold head pins, with a gold spacer bead at the base.  I thought this color scheme would look good on her olive skin tone.

For some instructions on how to make this necklace, check out this post!


Which color do you like better??


July 31, 2012

Chain Tassel Earrings, Part 2

Tassels have been of much inspiration to me this past spring.  While home over break from university, I made two pairs of earrings with chain tassels.

Pair 1
The first were inspired by a pair of earrings I had bought previously.  They were super easy to make and I always get compliments on these earrings when I wear them!


Supplies:
-Pair of earring hooks
-head pins with loop at bottom
-2 medium glass beads
-2 large decorative beads
-2 spacer beads
-chain (I used 3 pieces of chain per earring)
-pliers

On each head pin I put a large bead, a spacer, a glass bead, then closed the top into a loop.
For basic instructions on how to do this, look here.

I then opened the loop at the bottom of the head pin, and slid on 3 pieces of chain of equal length.  Close the loop tightly so to prevent the chains from falling off.


Add earring hooks to loop above glass bead.  All done!

Pair 2
The second pair took a little bit more time, but were not much more difficult.

Supplies:
- pair of earring hooks
- 2 cylinder shaped glass beads
- 10 small glass beads in various colors & shapes
- 10 normal head pins
- 2 head pins with looped bottom
- chain (I used 5 pieces of chain for each earring)
-pliers
-wire cutters

First, take the head pins with the looped bottoms and put a cylinder shaped bead on each.
Loop the top closed.

Put each of the small glass beads on a normal head pin (1 per pin).

Place 5 pieces of equal length chain to loop under the cylinder bead.  Do this for each earring.  Close the loop tightly afterwards so the chains do not slip off.

Once the chains are in place, add 1 bead on head pin to the end of each chain.  Loop the tops of the head pins closed.  Trim off any extra head pin with wire cutters.

The only step left is to attach the earring hooks to the top loop of the earring!

Here is some inspiration for tassel earrings.  I can't wait to make more of these!

                       Chain Tassel

                 String Tassel

These are more of a variation on the basic tassel earring:

              
                  Chan Luu earrings, $75.
Hoops with beaded tassels

July 21, 2012

Chain Tassel Earrings

I keep seeing tassel earrings everywhere this summer!
I spotted these earrings, left, on the Nordstrom website.  I really like the idea of using chain as the tassel instead of string.  On the right, the pair that I made for myself!!
Nordstrom earrings, $38
My DIY!


Making these earrings was super simple!  I found the four silver decorative pieces at the top while scavenging through my bead & sewing collection.  At ACMoore, I picked out the colored chain.  They had a variety of colors, but I picked the blue because it has a little bit of a silver shine on the sides!

First, I attached the top pieces with jump rings.  I used six jump rings initially on each earring, 2 at the top   of the first piece, 2 between the two pieces, and 2 at the bottom of the second piece.  I looped one jump ring through the two at the top of the first piece, and attached the earring hook to it.  With the two jump rings at the bottom of the second piece, I attached two more, but so that the 'o' faced forward instead of sideways.

I then decided on the length of the tassel I wanted and cut 10 pieces of equal length (5 for each earring).  After, I simply attached the chains to the bottom-most double jump rings and closed the rings tightly.  Ta da! My very own pair of chain tassel earrings!

Now, I'm looking for inspiration for some cute string tassel earrings.  My sister wants a pair too!
Here are some great ideas!

Mixing string and chain!


July 19, 2012

Pink Bauble Bead Necklace

I have always been more of an earrings-girl, but necklaces have been on top of my DIY list this summer!
While browsing through the Old Navy site, I came across this necklace:

Old Navy Pink Beaded Cluster Chain Necklace
And I thought, "Wait, I can make that!"

What you need:
- 2 pieces of chain
          one with medium links (about 4 inches)
          one with small links (to go around neck)
- 30+ headpins
- 30+ glass beads in various colors within one color scheme
- end clasp and jump rings
- round-nose pliers and needle nose pliers
- wire cutters

Take the chain with medium sized links and start adding headpins with beads.
For a tutorial on how to put beads on headpins, reference this DIY on Flamingo Toes
Here are a few pictures from Flamingo Toes:
Add bead to head pin, hold pin in round nose pliers, wrap wire around pliers to create a loop.

For this necklace, do not cut the remaining head pin yet! The extra wire makes it easier to place the bead on the chain once the cluster gets busy.

Add anywhere from 3 to 5 beads per link on the chain, depending on the size of the beads and the clustering desired.
Once the wire is filled with beads, attach the smaller chain to each end of the medium chain to form a circle.
Estimate where the small chain will hit the back of your neck and if possible, open the chain, or cut a link with the wire cutters.  On one end of the chain, attach a clasp.  On the other end, attach as many jump rings as desired (to alternate the length of the necklace).
Now, use the wire cutters to cut off as much of the remaining head pins as possible.  All done!

Made it myself!