Pages

Showing posts with label white. Show all posts

May 3, 2014

One Minute: Bezel stone earrings


What you will need:
  • 2 earring hooks
  • 2 matching, pre-bezeled stones from an arts & crafts supply store.
  • optional - jump rings (to create more space)
  • pliers

Turquoise earrings:
With the pliers slightly open the bottom of the earring enough to slide on the bezeled stone.  Use pliers to close the bottom of the earring.

White and grey earrings:
With the pliers, open a jump ring and connect one grey bezeled stone to one white bezeled stone.  Then close the jump ring tightly.
Using the pliers again, open the bottom of the earring enough to slide on the top of the grey bezeled stone.  Close the bottom of the earring with the pliers.

April 6, 2013

Pearl, Gold, Hoops. And time at home.

My DIY Hoops
I made the long trip home for the recent holiday break.  I've been loving living abroad, but I was missing my sisters, Mom's home-cooked meals, American clothing stores, and of course, my jewelry-making supplies.

I spent a lot of time in A.C. Moore and even more time planning what to make and then making it.
Inspiration: Earrings from here.
Perusing Pinterest, (as I spend many of my hours), I found these gorgeous earrings being sold on an Etsy site.

While I do not have the blue opal gemstone or the pearls as used by the creator of these earrings, I did find some teardrop shaped glass beads and fake pearls

So here's what you need to make your own pair:
- 2 earring hoops
- 24 small pearl beads
- 2 teardrop shaped beads
- 26 head pins
- pliers and wire cutters

3 Easy Steps
1.  Put the each pearl bead and teardrop bead on its own head pin.  Close the head pin with round-nose pliers and cut off any excess wire with the wire cutters.
2.  Slide 6 pearl beads on head pins onto the hoop, add one teardrop bead, and then another six pearl  beads.  Repeat for the other earring.
3.  Use the pliers to turn up the end of the hoops to close.  All done!

Here are my earrings:

August 5, 2012

Who Doesn't Like Braids?

I've seen this braided bead necklace on tons of Pinterest boards!
Of course, I had to make it!

The DIY Inspiration
The most time consuming aspect of this necklace was stringing 6 strands of beads (2 for each piece of the braid).

Supplies:
- a lot of 1 bead type
- string
- 6 crimping clasps (also called bead tips?)
- 2 jump rings
- chain
- closing clasp
-pliers

For photo instructions, check out this image.

I went to ACMoore and bought a pack of reddish coral beads for this.  I cut 6 pieces of string, and tied them 2, 2, and 2 (so three strands).  Once I beaded to the desired length, I closed the knots of each 3 strands to separate crimping clasps, on each side (so 6 clasps total). Close the crimping clasps.  Then, braid!!
Once the beads are neatly braided, I combined the 3 closing clasps on the left onto one jump ring, and the 3 clasps on the right onto a second jump ring.
Then, attach the chain to the jump rings on each side.  Open the chain at the top to put on a closing clasp.  All done!


I made a second one in white with gold chain for my mom.  But, it looked great on my sister, so we gave it to her!


July 19, 2012

Pink Bauble Bead Necklace

I have always been more of an earrings-girl, but necklaces have been on top of my DIY list this summer!
While browsing through the 
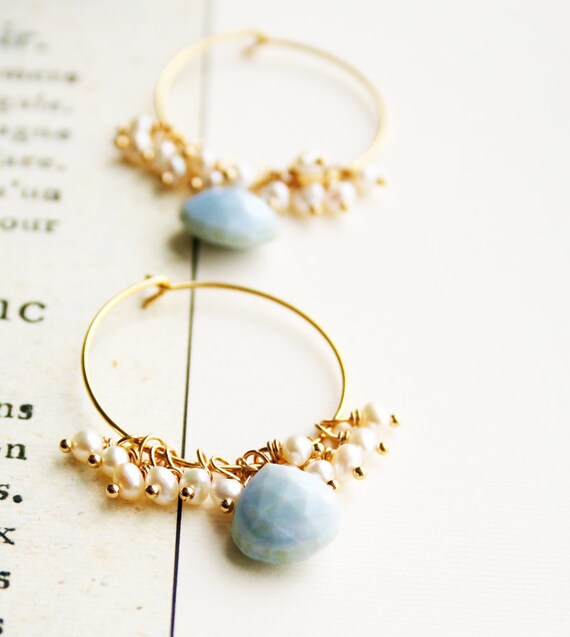
Old Navy site, I came across this necklace:

Old Navy Pink Beaded Cluster Chain Necklace
And I thought, "Wait, I can make that!"

What you need:
- 2 pieces of chain
          one with medium links (about 4 inches)
          one with small links (to go around neck)
- 30+ headpins
- 30+ glass beads in various colors within one color scheme
- end clasp and jump rings
- round-nose pliers and needle nose pliers
- wire cutters

Take the chain with medium sized links and start adding headpins with beads.
For a tutorial on how to put beads on headpins, reference this DIY on Flamingo Toes
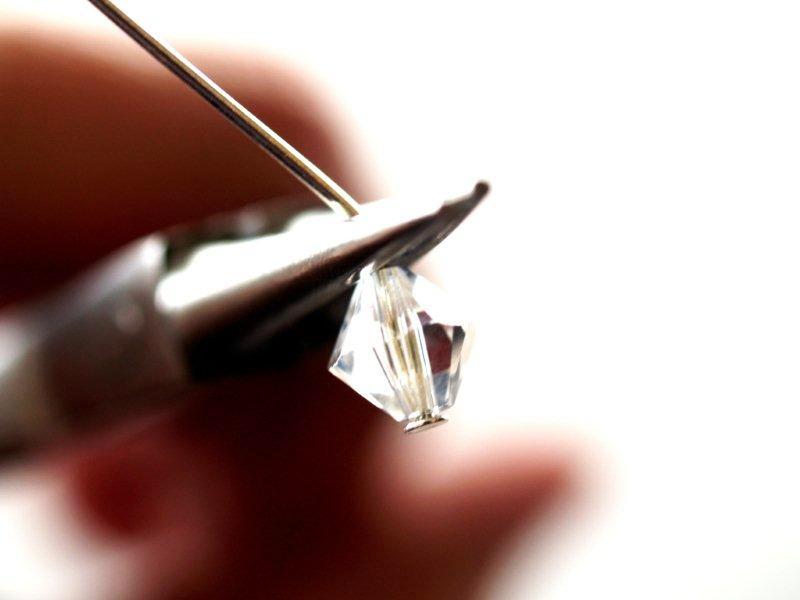
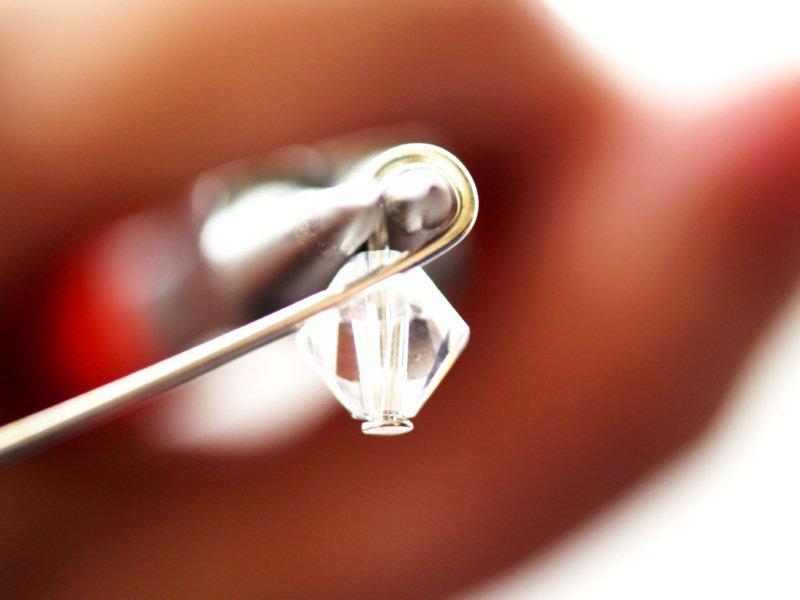
Here are a few pictures from Flamingo Toes:
Add bead to head pin, hold pin in round nose pliers, wrap wire around pliers to create a loop.

For this necklace, do not cut the remaining head pin yet! The extra wire makes it easier to place the bead on the chain once the cluster gets busy.

Add anywhere from 3 to 5 beads per link on the chain, depending on the size of the beads and the clustering desired.
Once the wire is filled with beads, attach the smaller chain to each end of the medium chain to form a circle.
Estimate where the small chain will hit the back of your neck and if possible, open the chain, or cut a link with the wire cutters.  On one end of the chain, attach a clasp.  On the other end, attach as many jump rings as desired (to alternate the length of the necklace).
Now, use the wire cutters to cut off as much of the remaining head pins as possible.  All done!

Made it myself!