Pages

July 31, 2012

Chain Tassel Earrings, Part 2

Tassels have been of much inspiration to me this past spring.  While home over break from university, I made two pairs of earrings with chain tassels.

Pair 1
The first were inspired by a pair of earrings I had bought previously.  They were super easy to make and I always get compliments on these earrings when I wear them!


Supplies:
-Pair of earring hooks
-head pins with loop at bottom
-2 medium glass beads
-2 large decorative beads
-2 spacer beads
-chain (I used 3 pieces of chain per earring)
-pliers

On each head pin I put a large bead, a spacer, a glass bead, then closed the top into a loop.
For basic instructions on how to do this, look here.

I then opened the loop at the bottom of the head pin, and slid on 3 pieces of chain of equal length.  Close the loop tightly so to prevent the chains from falling off.


Add earring hooks to loop above glass bead.  All done!

Pair 2
The second pair took a little bit more time, but were not much more difficult.

Supplies:
- pair of earring hooks
- 2 cylinder shaped glass beads
- 10 small glass beads in various colors & shapes
- 10 normal head pins
- 2 head pins with looped bottom
- chain (I used 5 pieces of chain for each earring)
-pliers
-wire cutters

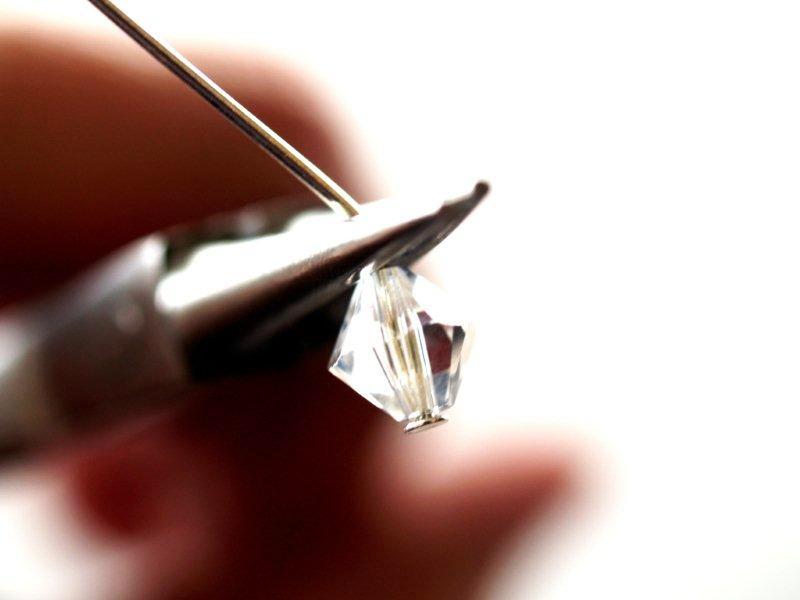
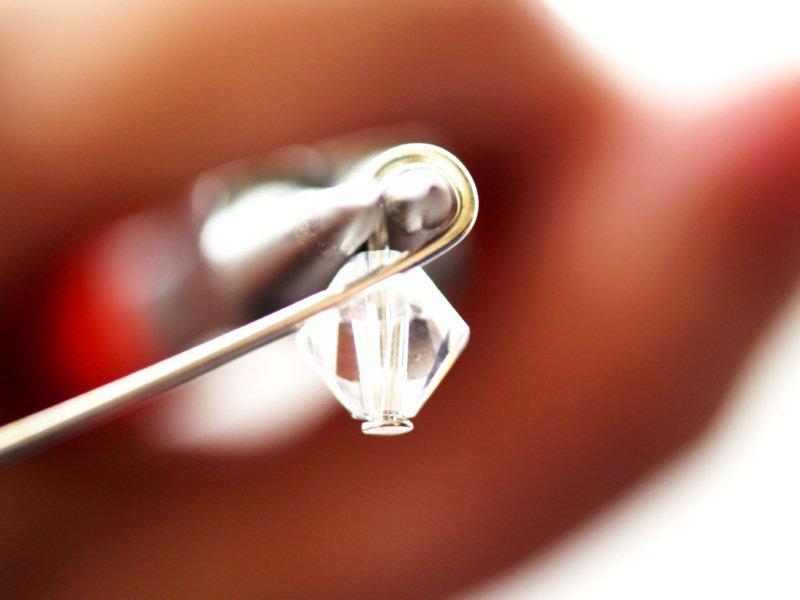
First, take the head pins with the looped bottoms and put a cylinder shaped bead on each.
Loop the top closed.

Put each of the small glass beads on a normal head pin (1 per pin).

Place 5 pieces of equal length chain to loop under the cylinder bead.  Do this for each earring.  Close the loop tightly afterwards so the chains do not slip off.

Once the chains are in place, add 1 bead on head pin to the end of each chain.  Loop the tops of the head pins closed.  Trim off any extra head pin with wire cutters.

The only step left is to attach the earring hooks to the top loop of the earring!

Here is some inspiration for tassel earrings.  I can't wait to make more of these!

                       Chain Tassel

                 String Tassel

These are more of a variation on the basic tassel earring:

              
                  Chan Luu earrings, $75.
Hoops with beaded tassels

July 29, 2012

In honor of the Olympics...

Rings necklaces have been all over Pinterest this summer!  The multiple rings linked together, sometimes in various sizes, remind me of the 5 overlapping Olympic rings.  Incidentally, I've been crafting lots while watching the Olympics.
Here are a few of the necklaces I have spotted:


I found some large silver rings at home and the small pieces to attach the rings together.  Technically, the rings could also be attached using very small jump rings. 
I set up the rings in the pattern I wanted for the necklace.  Carefully, I attached the rings to each other.

While abroad, I bought a bundle of suede strings in a bunch of colors for dirt cheap!  I used the taupe/grey colored suede string to turn the linked together rings into a necklace.  I looped the suede string through a few of the smaller rings and then using the same small attaching pieces to connect it to the top of the larger rings.  Ta da! My very own ring necklace!

Better pictures to come soon!


July 23, 2012

Chain + Jump Rings + Beads!


The top, left picture is of an Ann Taylor Loft necklace, priced at $39.95, the photo on the right is the Flamingo Toes DIY of the loft necklace, and the last picture is my own DIY!!

What you need:
- Jump rings in 4 different sizes (for example: extra small, small, medium, large)
- a piece of chain to attach beads (4 to 6 inches)
- a second piece of nicer chain to hang around neck
- 25 or so glass beads in an assortment of colors
- one head pin per bead
- closure and jump rings (to adjust length of necklace)

First, put each glass bead being used on a head pin and close it.  For instructions on doing this, look here.

Then, slide the jump rings into the chain in size order.  I did 15 xsmall --> 20 small --> 25 medium --> 30 large --> 25 medium --> 20 small --> 15 xsmall.  When changing between the sizes, link one jump ring of the larger size into the appropriate place in the chain.  By doing this, the jump rings will stay in place on the chain and won't slide over each other.

With the rings in place, attach the beads on their head pins to the large jump rings in the middle of the necklace.  I didn't attach more than one bead to a jump ring, but I didn't put a bead on every jump ring.  Play around and see what looks nice.. it's easy enough to open the jump ring and move the bead somewhere else!  

If this is confusing, Flamingo Toes has a great tutorial for this necklace here.  It took me about and hour and a half to make this.

I used larger jump rings and larger glass beads in clear and a range of shades of turquoise than other necklaces.  My necklace has a bit more of an African-y feel to it and definitely more of a statement piece, while the original necklace is smaller and more delicate.  The necklace goes really nicely with my tribal print black & white maxi dress.  Also, I just bought teal colored jeans and I can't wait to pair this necklace with them!


July 21, 2012

Chain Tassel Earrings

I keep seeing tassel earrings everywhere this summer!
I spotted these earrings, left, on the Nordstrom website.  I really like the idea of using chain as the tassel instead of string.  On the right, the pair that I made for myself!!
Nordstrom earrings, $38
My DIY!


Making these earrings was super simple!  I found the four silver decorative pieces at the top while scavenging through my bead & sewing collection.  At ACMoore, I picked out the colored chain.  They had a variety of colors, but I picked the blue because it has a little bit of a silver shine on the sides!

First, I attached the top pieces with jump rings.  I used six jump rings initially on each earring, 2 at the top   of the first piece, 2 between the two pieces, and 2 at the bottom of the second piece.  I looped one jump ring through the two at the top of the first piece, and attached the earring hook to it.  With the two jump rings at the bottom of the second piece, I attached two more, but so that the 'o' faced forward instead of sideways.

I then decided on the length of the tassel I wanted and cut 10 pieces of equal length (5 for each earring).  After, I simply attached the chains to the bottom-most double jump rings and closed the rings tightly.  Ta da! My very own pair of chain tassel earrings!

Now, I'm looking for inspiration for some cute string tassel earrings.  My sister wants a pair too!
Here are some great ideas!

Mixing string and chain!


July 20, 2012

Oh, the Possibilities!


Earlier this year, I bought a pack of plain wire hoops from ACMoore.  It took some brainstorming and playing around, but I ended up making three different pairs of beaded hoops for myself.

You can buy a pack of hoops like this, or make your own from a thicker wire.
Pick out some pretty glass beads - ideally that stick out from your hair color! - and some plain spacer beads (in gold, silver, clear, or any other color, really!).
Put the beads you want to hang from the hoop on head pins.  For a tutorial on how to do this, look here.

I made two styles of earrings from the wire hoops. For the first, i put the hoop itself directly into my ears.  This way the hoop itself is parallel to my face.  On the second style, I attached an earring hook to the top of the hoop. By adding the earring hook, the hoop now sits perpendicular to my face - it faces forward instead of sideways.

Check out the three pairs that I made: Which do you like best?


July 19, 2012

Pink Bauble Bead Necklace

I have always been more of an earrings-girl, but necklaces have been on top of my DIY list this summer!
While browsing through the Old Navy site, I came across this necklace:

Old Navy Pink Beaded Cluster Chain Necklace
And I thought, "Wait, I can make that!"

What you need:
- 2 pieces of chain
          one with medium links (about 4 inches)
          one with small links (to go around neck)
- 30+ headpins
- 30+ glass beads in various colors within one color scheme
- end clasp and jump rings
- round-nose pliers and needle nose pliers
- wire cutters

Take the chain with medium sized links and start adding headpins with beads.
For a tutorial on how to put beads on headpins, reference this DIY on Flamingo Toes
Here are a few pictures from Flamingo Toes:
Add bead to head pin, hold pin in round nose pliers, wrap wire around pliers to create a loop.

For this necklace, do not cut the remaining head pin yet! The extra wire makes it easier to place the bead on the chain once the cluster gets busy.

Add anywhere from 3 to 5 beads per link on the chain, depending on the size of the beads and the clustering desired.
Once the wire is filled with beads, attach the smaller chain to each end of the medium chain to form a circle.
Estimate where the small chain will hit the back of your neck and if possible, open the chain, or cut a link with the wire cutters.  On one end of the chain, attach a clasp.  On the other end, attach as many jump rings as desired (to alternate the length of the necklace).
Now, use the wire cutters to cut off as much of the remaining head pins as possible.  All done!

Made it myself!